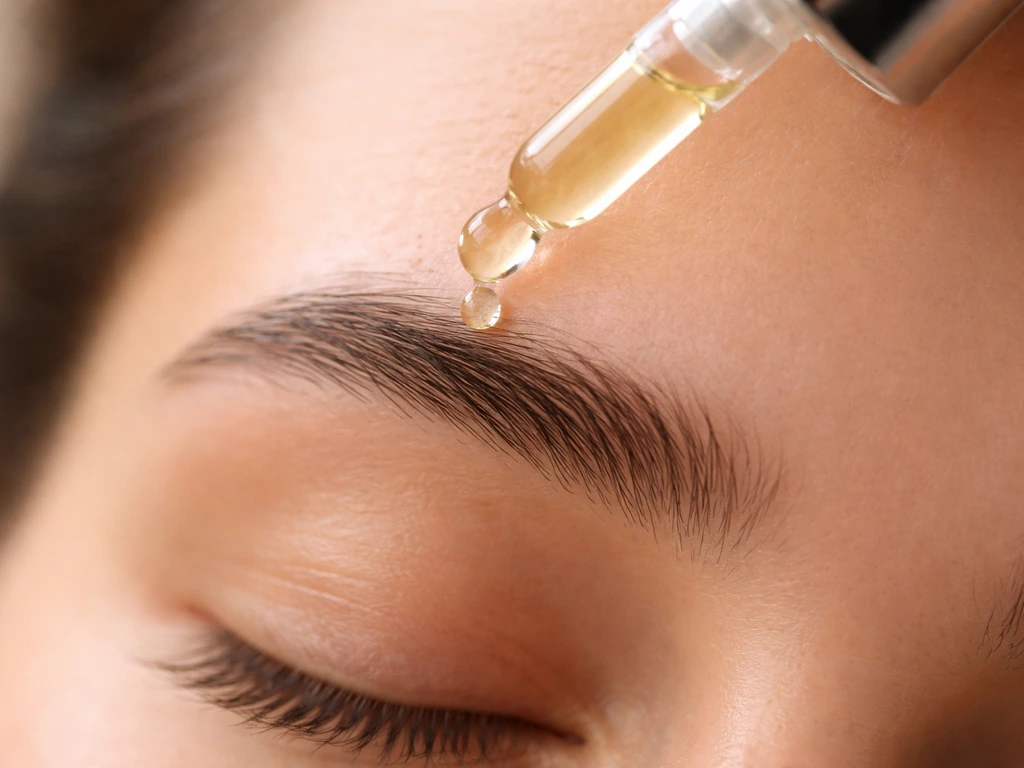
Eyebrows that grow downward are almost always a follicle angle issue, not a growth problem. The hairs are coming in exactly as their follicles are angled, whether that angle is natural, the result of years of over-plucking, or just regrowth that hasn't been trained yet. The good news: you have three practical layers of solution available right now. Trim and shape to remove the hairs that are pulling your arch downward. Style with a brow gel, soap brow, or heated brush to mechanically lift and hold hairs upward. Then, if you want a longer-term fix, look at lamination for a semi-permanent lift or consistent mechanical training to nudge the direction over time. This guide walks through every step in that order, from a 10-minute groom session to professional treatments.
How to Fix Eyebrows That Grow Down: Lift, Train & Treat
Why your eyebrow hairs are growing downward
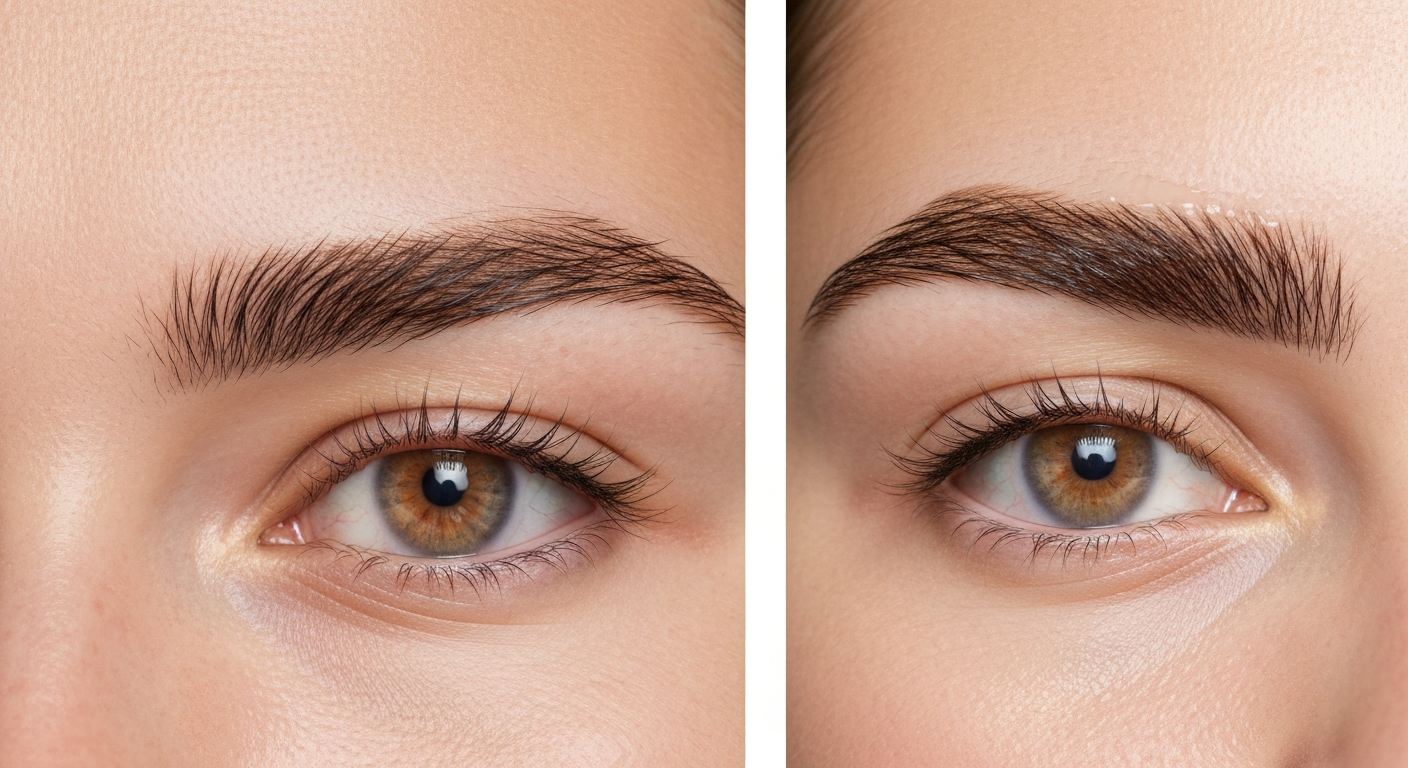
Hair direction is set by the angle of the follicle beneath the skin. In the eyebrow, hairs in the inner third typically grow upward and slightly outward, hairs in the middle arch zone grow at a diagonal, and hairs toward the tail often grow more horizontally or slightly downward. This is normal anatomy. The problem is when a larger portion than usual is pointing straight down, usually because of one of three things.
First, natural follicle angle. Some people simply have follicles that sit at a steeper downward angle, a trait influenced by genetics and sometimes by ethnicity. If your brows have always grown this way and no one in your family has particularly arched brows, this is likely just your baseline.
Second, regrowth after over-plucking or shaving. When you repeatedly remove hair, the follicle doesn't reorient itself, but the new hair can emerge at a slightly different surface angle because the surrounding skin and follicle structure may have been disturbed. Many people notice that regrown hairs after heavy plucking are coarser and grow in less predictably, often downward or at odd angles.
Third, hair texture and hair cycle timing. Eyebrow anagen (active growth) phases are short, typically somewhere in the range of two to eight weeks according to eyebrow hypotrichosis trial data, with most follicles resting in telogen for around 60 to 90 days. That means at any given moment, a large proportion of your brow hairs are short and just emerging. Short hairs don't hold a styled direction well and tend to fall in the path of least resistance, which is downward with gravity. As they grow longer, the problem often becomes easier to manage.
Before you start: safety, skin sensitivity, and what to avoid
Most of the methods here are low-risk, but a few carry real contraindications worth knowing before you dive in.
- Patch test anything new before applying it near your eyes. This includes brow gels, serums, castor oil, and especially lamination chemicals. Apply a small amount to the inside of your elbow 24 to 48 hours before full use and check for redness, swelling, or itching.
- Brow lamination uses thioglycolate-based reducing agents to break the disulfide bonds in your hair. These chemicals can cause chemical burns, contact dermatitis, and hyperkeratosis if left on too long or used on broken or irritated skin. Do not attempt DIY lamination on inflamed, cut, or sensitized skin.
- Minoxidil should not be applied near the eyes, and overuse or sloppy application can cause unwanted facial hair growth (hypertrichosis) in surrounding areas. If you have cardiovascular conditions, talk to a doctor before using it.
- Heated styling tools get hot enough to singe delicate facial hair. Many professional heated brushes reach up to 220 to 232°C at maximum settings. Use the lowest effective setting and never hold the tool in contact with your skin.
- If you have a history of eyelid contact dermatitis, rosacea, eczema, or atopic skin, you are at higher risk of reactions to both topical actives and styling products. Choose fragrance-free, minimal-ingredient formulas.
- Microblading and permanent procedures involve needles, pigment, and real infection risk. These should only be performed by trained, licensed practitioners using sterile equipment.
Tools and products worth having on hand
You don't need a lot, but having the right tools makes a significant difference. Here's what I'd consider the practical minimum kit, split by what each item actually does.
| Tool / Product | What it does | Notes |
|---|---|---|
| Spoolie brush | Brushes hairs upward before trimming or styling | A clean mascara wand works fine |
| Small curved brow scissors | Trims hairs that extend below the brow line | Curved blades give better angle control than straight |
| Eyebrow razor / dermaplaning tool | Removes stray hairs cleanly without pulling | Use only on clean, dry skin |
| Clear brow gel (strong hold) | Sets hairs in an upward direction | Look for PVP or VP/VA copolymer as the film-former |
| Soap brow bar or clear soap | Creates an ultra-firm, flat hold | A travel bar of glycerin soap works well |
| Brow styling wax or pomade | Adds directional control and definition | Wax-based gives stronger hold than gel for very coarse hairs |
| Heated brow brush / mini straightener | Uses gentle heat to bend the hair shaft temporarily upward | Use lowest setting; max 150–160°C for fine brow hairs |
| Eyebrow serum (peptide-based or minoxidil) | Supports density and possibly some directional training via growth promotion | Realistic timeline: visible change at 8–16 weeks minimum |
| Castor oil | Commonly used as a conditioning treatment | No RCT evidence for direction change; can help with hair softness |
Step-by-step grooming: the immediate trim and shape
Trimming is the fastest fix for downward-growing hairs. Hairs that extend below the natural brow line are almost always the culprit for the drooping appearance. Once they're removed, the remaining hairs sit closer to the skin and are far easier to style upward. Here's the method I use and recommend.
- Start with completely clean, dry brows. Remove any makeup, oil, or product. Oils and product residue cause hairs to clump together, making it impossible to see exactly where individual hairs are falling.
- Use a spoolie to brush all hairs straight downward first. This sounds counterintuitive, but it lets you clearly see the natural growth direction and which hairs extend below your intended brow line.
- Identify the lower boundary of your desired brow shape. This is usually 1 to 2 mm below the hairline at its thinnest point.
- Using curved brow scissors, trim any hairs that fall below that lower boundary. Cut parallel to the skin surface, not perpendicular. Take off small amounts at a time — you can always cut more.
- Now brush all hairs upward with the spoolie. Look for any hairs that are so long they flop back down even when brushed up. These need to be trimmed from the top: brush the hair straight up, hold it against the brow, and trim the tip that falls above the top of your brow bone.
- Re-brush upward after each trim pass and assess. The goal is that all hairs can sit in an upward or at least horizontal position without springing back down from their own weight.
- Clean up any stray hairs below or above the intended shape with a brow razor. Hold the skin taut, use short light strokes, and rinse the blade after each pass.
- Finish by brushing upward once more and applying your hold product of choice (see the next section).
A word of caution here: resist the urge to over-thin the brow. A common mistake I see is people removing too many hairs from the lower brow trying to clean up the shape, ending up with a sparse tail or a gap in the arch. If you're working with already thin brows, focus trimming on length reduction and only remove strays that are clearly outside the shape.
Styling techniques that lift brows right now
Once the shape is cleaned up, hold is everything. The film-forming polymers in brow gels (typically polyvinylpyrrolidone, PVP, or VP/VA copolymers) coat the hair shaft and dry into a flexible film that keeps hairs positioned where you left them. Different products and techniques give you different levels of hold, and the best choice depends on your hair texture and how active your day is.
Brow gel: the everyday approach
- Brush brows upward with a clean spoolie first, positioning all hairs in the direction you want them to hold.
- Load a small amount of gel onto the spoolie wand (wipe off excess on the tube opening to avoid clumping).
- Brush upward and slightly outward through the brow, following the direction you've already set.
- Use the tip of the wand to press down any individual hairs that aren't cooperating.
- Let dry completely before touching (30 to 60 seconds for most gels). Do not brush again once drying has started.
Soap brow: strongest DIY hold
Soap brows became widely popular for a reason: a hard soap bar (particularly clear glycerin-based soaps) creates a very stiff, high-definition hold that outperforms most brow gels for difficult, downward-growing hairs. The soap flakes wrap around the hair shaft and set hard on drying.
- Lightly dampen a clean spoolie with water. You want damp, not dripping.
- Swipe the spoolie across a hard soap bar two or three times to load it with product.
- Brush through your brow hairs in an upward motion, pressing the hairs into shape as you go.
- Work quickly because the soap sets fast. If needed, use your fingertip to press stubborn hairs flat against your brow bone.
- Let dry fully (about 60 to 90 seconds). The hold will be notably stiffer than gel.
- Optional: set with a small amount of clear brow gel over the top for extra longevity.
Heated brush method: training the hair shaft with heat
Heat temporarily changes the hydrogen bonds in the hair shaft, which allows you to shape it in a new direction that holds longer than cold styling alone. Manufacturer user manuals for heated styling tools, such as the Hot Tools Pro Pro Signature 1‑inch Digital Ceramic Flat Iron, user manual (example pro tool manual), routinely specify maximum operating temperatures and warn to avoid skin contact and to use the lowest effective heat for delicate facial hairs Hot Tools Pro Signature 1‑inch Digital Ceramic Flat Iron — user manual (example pro tool manual). This works on the same principle as blow-drying hair in a different direction: the heat sets the temporary shape, which lasts until the hair gets wet again. It is not a permanent follicle change, but it extends the duration of your styled direction significantly.
- Ensure brows are clean and completely dry. Using heat on damp hair near the skin increases burn risk.
- Set your heated brow brush or mini straightener to its lowest effective setting. For fine to medium brow hairs, 120 to 150°C is usually sufficient. Never exceed 180°C on facial hair.
- Brush brows upward with a dry spoolie first to pre-position the hairs.
- Press the heated tool gently onto the brow, lifting and pressing hairs upward as you move from the inner corner to the tail. Hold each section for two to three seconds maximum.
- Do not press the heated surface directly onto your skin. Keep the tool on the hair only.
- Immediately after heating each section, press the hairs into shape with a clean finger or spoolie tip while they cool (about 10 seconds). This sets the new shape.
- Follow immediately with a brow gel or soap brow over the top while hairs are still warm and compliant.
- Repeat daily for cumulative effect. Consistent daily heat styling tends to make subsequent days slightly easier as the hair becomes conditioned to the direction.
Mechanical training: can you actually change the direction over time?
This is the question I get asked most often, and I want to be honest about what the evidence does and does not support. For a practical, step-by-step routine on how to make eyebrows grow upwards, see the guide on how to make eyebrows grow upwards. For a focused read on options and realistic expectations for how to make eyebrow hair grow in a different direction, see this detailed guide. Daily brushing, taped shaping overnight, and consistent heated styling can all nudge hairs to hold a direction more easily over weeks and months. But these methods are working on the hair shaft, not the follicle. The follicle angle, which is the biological structure that determines long-term growth direction, is not currently changeable by any home brushing or DIY technique. Cosmetology training materials and professional brow curricula describe these approaches as temporary mechanical re-direction, not permanent biological change.
That said, 'temporary but cumulative' is still genuinely useful. Here's what the practical approach looks like.
Daily brushing protocol
Brush brows upward with a spoolie morning and night, every single day. This takes about 30 seconds. The mechanical pressure and repetition don't change the follicle, but they do condition the hair shaft over weeks to lie more willingly in that direction. Think of it as training a cowlick: you're not changing the scalp, but consistency makes the hair more compliant. Expect it to take four to six weeks before you notice the hairs holding their upward position noticeably more easily on their own.
Taped overnight shaping
Some brow artists recommend pressing hairs upward and taping them with a strip of medical micropore tape or spirit gum while you sleep, then removing in the morning. There is no clinical trial data on this practice. The mechanistic reasoning is the same as daily brushing, with the added benefit of sustained direction-hold for several hours. If you try this, patch test the tape adhesive first: some cyanoacrylate-based cosmetic adhesives are listed as potential skin and eye irritants on their safety data sheets. Micropore tape is gentler. Expect at best a gradual softening of the downward tendency over four to eight weeks, not a dramatic directional flip.
Realistic expectations for mechanical training
In my experience and based on what the dermatology and cosmetology literature actually shows: daily mechanical training can make your brows easier to style upward and can reduce the amount of product you need to hold them. It does not permanently re-angle follicles. You will still need some hold product on days when you want the brows to stay up. If you want genuine longer-term direction change from a professional standpoint, that takes you into lamination territory, or in permanent cases, eyebrow transplantation where surgeons implant follicles at precise shallow angles to control the final direction.
What topical products can actually do: castor oil, rosemary, and minoxidil
Topical treatments won't change the direction hairs grow. That's worth saying clearly upfront. What they can do is improve hair density, diameter, and overall growth, which indirectly helps: thicker, denser hairs respond better to styling and are easier to train to hold a direction. Here's where the evidence actually stands.
Minoxidil: the strongest evidence base for home use
Topical minoxidil at 1% to 2% concentrations has been tested in randomized, double-blind, placebo-controlled split-face studies specifically for eyebrow enhancement. The research shows measurable improvement in eyebrow hair density and diameter, with first visible changes typically appearing at 8 to 12 weeks and more robust gains by 16 to 24 weeks. A separate comparative trial found both 2% minoxidil and bimatoprost (0.01% and 0.03%) produced measurable eyebrow improvement, making minoxidil the most accessible option with the most direct evidence at this concentration range.
The safety profile matters here though. Minoxidil applied near the face carries a real risk of unwanted facial hypertrichosis, meaning hair growth in areas you didn't intend to treat, particularly the forehead and temples if the product migrates. Irritant and allergic contact dermatitis are also documented. Apply only to the brow itself with a cotton swab or a precise applicator, not your fingers, and use the smallest effective amount. If you have any cardiovascular history, consult a doctor first. This is an off-label use for eyebrows: minoxidil is FDA-approved for scalp hair loss, not eyebrow use.
Bimatoprost: stronger evidence but harder to access
Topical bimatoprost (0.01% to 0.03%), a prostaglandin analogue, has been studied in randomized double-blind trials specifically for eyebrow hypotrichosis. It increases hair density, diameter, and achieves favorable clinician global assessments versus vehicle, with benefits measurable at 12 to 24 weeks. The ophthalmic formulation is FDA-approved for eyelash hypotrichosis (Latisse), and its use on eyebrows in trials is investigational or off-label. It requires a prescription in most markets. Side effects monitored in trials include local skin pigmentation changes and potential eye-area effects. It has a stronger evidence base than plant oils, but accessibility limits it as a first-line home option.
Castor oil: widely used, weakly supported
I want to be fair to castor oil here, because I've used it and many people have positive anecdotal experiences. But the honest assessment from the dermatology literature is that there are no high-quality randomized controlled trials showing castor oil reliably increases terminal hair count or density on eyebrows. The proposed mechanism, via ricinoleic acid's effects on prostaglandin receptors, is speculative. A narrative review of castor oil in dermatology found no robust RCT evidence for hair growth claims. Rare allergic contact reactions to castor oil derivatives are documented. It's inexpensive, well-tolerated by most people, and fine to use as a conditioning treatment that may support hair health and softness, making hairs slightly more manageable. But set realistic expectations: this is not a proven growth treatment.
Rosemary oil: promising but limited eyebrow data
Rosemary oil has a single notable randomized trial showing it performs similarly to 2% minoxidil for scalp androgenetic alopecia at 6 months, which has generated a lot of interest. There is no equivalent eyebrow-specific RCT data. Given that eyebrow follicles have a fundamentally different hair cycle and hormonal response than scalp follicles, scalp data doesn't translate directly. Rosemary oil is low-risk for most people (patch test as with any essential oil), reasonable to try, but its eyebrow-specific evidence is limited to anecdote and mechanism hypothesis at this point.
| Treatment | Evidence level (eyebrows) | Realistic timeline | Key risks | Direction change? |
|---|---|---|---|---|
| Minoxidil 2% topical | Moderate: RCTs, split-face trials | 8–12 weeks first signs; 16–24 weeks for gains | Hypertrichosis, contact dermatitis | No (improves density only) |
| Bimatoprost 0.03% | Strong: multiple RCTs | 12–24 weeks | Skin pigmentation, eye-area effects, prescription-only | No |
| Castor oil | Very low: no RCTs for eyebrows | Unknown / unproven | Rare allergic contact reaction | No |
| Rosemary oil | Very low for eyebrows (scalp data only) | Unknown / unproven | Contact sensitization (dilute before use) | No |
| Peptide serums (OTC) | Low: limited, often industry-funded studies | Varies by product | Generally low-risk | No |
Professional treatments: what they do and when they're worth it
Brow lamination: the most practical fix for downward growth
Brow lamination is currently the most effective non-permanent solution for downward-growing brows, and it's the one I'd recommend investigating first if daily styling is becoming a chore. The procedure uses ammonium thioglycolate (or another thioglycolate-based reducing agent) to break the disulfide bonds in your brow hairs, which softens them and allows them to be repositioned. A neutralizer (oxidizer) then re-sets the bonds in the new upward position. The result is brows that hold an upward, lifted direction for roughly six to eight weeks without any daily product.
Peer-reviewed analysis of thioglycolate compounds in brow lamination confirms the chemistry works, but also documents the real adverse events: chemical irritation, contact dermatitis, burns from over-processing, and hyperkeratosis. Reputable practitioners follow precise timing protocols, adjust processing time for hair texture, perform patch tests, and will not treat broken, inflamed, or sensitized skin. This is why professional application is strongly preferable to at-home kits for most people, especially around the eye area.
After lamination, you need to avoid wetting the brows for 24 to 48 hours and conditioning them regularly because the chemical process does cause some structural dryness. Most practitioners recommend a conditioning oil or serum as aftercare. Results typically last six to eight weeks, and the treatment can be repeated at that interval without cumulative structural damage if done properly. It is not appropriate for very fine, damaged, or previously over-processed hair.
Professional shaping and tinting
A professional brow shaping session with a skilled technician is more than just waxing and threading. An experienced brow artist can identify which hairs are fighting the direction you want, design a shape that works with your natural growth pattern rather than against it, and thin the right sections to reduce the visual weight of downward-growing hairs. Tinting adds dimension and makes lighter hairs that were hard to see (and style) more visible and manageable. Combined with lamination, professional shaping gives you the most controlled result. On its own, it's a good starting point if you've been maintaining your own brows and have gotten into a shape that's contributing to the problem.
Microblading and microshading: semi-permanent options
Microblading and microshading deposit pigment into the upper dermis to create the appearance of individual hairs or a filled, defined brow. They do not change how your actual hairs grow, but they can create an illusion of a better-shaped, upward-arching brow that reduces the visual impact of the real downward-growing hairs underneath. For people with sparse brows where the downward-growing hairs are also thin and light, this combination of semi-permanent makeup with lamination is quite effective.
The risks with microblading are real and worth knowing. Cross-sectional and prospective safety evaluations document complications including infection, allergic reaction to pigment, pigment migration, scarring, and uneven results. These risks are significantly reduced when the procedure is performed by a trained, licensed practitioner using sterile single-use equipment and proper informed consent, but they are not zero. Results typically last 12 to 18 months with a touch-up at 6 to 8 weeks post-initial procedure. Removal or correction of bad results is difficult and expensive.
Eyebrow transplantation: the permanent solution
Eyebrow transplantation is the only procedure that can actually change hair growth direction on a permanent basis, and it does so by physically implanting follicles at a different angle. Systematic reviews of eyebrow transplantation emphasize that follicle orientation at implantation is the primary determinant of final growth direction: surgeons place single-hair grafts at shallow angles with precise directional vectors to recreate or redesign the native brow direction. This is a surgical procedure, expensive (typically several thousand dollars), requires significant downtime, and is generally only appropriate when other causes of sparse or misdirected brows have been ruled out. It is the gold standard for permanent, anatomically correct direction change, but it's overkill for most people whose brows are directional but not sparse.
| Treatment | Direction change? | Longevity | Downtime | Best for |
|---|---|---|---|---|
| Brow lamination | Yes (temporary: 6–8 weeks) | 6–8 weeks | 24–48 hrs (no wetting) | Healthy brows needing lift and hold |
| Professional shaping | No (shape optimization only) | Until regrowth (2–4 weeks) | None | Refining shape to work with growth pattern |
| Tinting | No (visual improvement only) | 3–6 weeks | None | Light/fine hairs that are hard to style |
| Microblading / microshading | No (pigment illusion only) | 12–18 months | Minimal (avoid sun/water 7–10 days) | Sparse brows where pigment fills the shape |
| Eyebrow transplant | Yes (permanent) | Permanent | Weeks to months | Severe sparseness or permanent direction change needed |
Putting it all together: a practical maintenance plan
Here's how I'd sequence the approach depending on how much time and investment you want to put in.
Start this week: trim and shape using the step-by-step method above to remove hairs pulling the brow downward, then choose your hold product. If your brows are particularly resistant, try soap brow over a heated brush styling session for the first couple of weeks to really see how much upward position is achievable before deciding on next steps.
Weeks two through eight: add daily brushing morning and night to start conditioning the hairs. If you want to support density and thickness (which helps with styling), this is a reasonable point to start a topical treatment, minoxidil 2% applied carefully to the brow only being the most evidence-backed home option. Don't expect direction change from this, but do expect brows to feel thicker and more controllable by weeks eight to twelve.
At the two-month mark: if daily styling is still a hassle, book a brow lamination appointment with a reputable technician. This is the point of maximum return on investment: your brows are fuller from any growth treatments you've been using, they're shaped well from your grooming routine, and lamination will hold the upward direction without daily effort for the next six to eight weeks.
If you're also dealing with brows that are sparse and not just directionally difficult, the guidance on growing eyebrows that won't grow is worth reading alongside this, since the cause and approach differ somewhat from a purely mechanical direction problem. If your issue extends to hairs that grow sideways or straight out as well as downward, the approach to taming brows that grow straight out shares some methods with what's described here, particularly the heat-and-hold styling sequences.
When to see a doctor rather than a brow artist
Most downward-growing brows are a cosmetic issue and nothing more. But there are situations where brow changes warrant a dermatology appointment. If your brows have recently changed direction or become sparser without explanation, if you're losing hair from the outer third of your brows (a known sign of thyroid disorders and conditions like frontal fibrosing alopecia), or if you have persistent skin changes around the brow area including scaling, redness, or folliculitis, these are clinical rather than cosmetic concerns. Similarly, if you want to use minoxidil or access bimatoprost, a dermatologist can evaluate whether these are appropriate for your specific situation and help you use them safely.
FAQ
What primary clinical research is needed to support claims about topical growth agents (minoxidil, bimatoprost, latanoprost) for eyebrow direction or density?
Randomized controlled trials and high‑quality open‑label studies that report eyebrow endpoints (density, diameter, clinician global assessment, and patient‑reported outcomes) with clear formulations and dosing regimens. Extractable data should include sample size, concentration (eg, minoxidil 1%–2%, bimatoprost 0.01%–0.03%), application frequency, objective/photographic measures, timelines to first visible change (eg, 8–24 weeks), and adverse events (local irritation, hypertrichosis, pigmentation). Relevant examples: RCTs of bimatoprost and minoxidil cited in PubMed/PMC (provided list). Rate evidence as: level 1 RCTs (high), open‑label split‑face trials (moderate), case reports (low).
What evidence is required to evaluate non‑drug topicals commonly recommended (castor oil, plant oils, peptide serums)?
Systematic reviews, narrative reviews and controlled trials — if available — that assess terminal hair count/density on eyebrows, plus dermatology safety literature documenting contact dermatitis/allergic reactions. For absent RCTs, state lack of high‑quality evidence and classify as speculative/low level. Use mechanistic reviews (eg, castor oil narrative review) and allergy case reports to discuss plausibility and safety. Provide realistic timelines (often unsupported; note that biological hair cycles imply delays of months).
Which sources should be used to explain eyebrow hair biology and timelines for seeing change?
Peer‑reviewed dermatology reviews and primary studies describing eyebrow hair‑cycle characteristics (anagen length, telogen percentages) and how follicle biology constrains response time. Use trials that report onset (eg, 8–12 weeks first change, 12–24 weeks larger gains) to set realistic expectations. Rate as high if from dermatology journals/PMCID trials (examples provided).
What evidence and expert inputs are required to write accurate step‑by‑step DIY trimming and shaping instructions?
Cosmetology textbooks, accredited brow‑artist curricula, professional training manuals, and expert interviews with licensed estheticians or brow technicians. Sources should provide standardized trimming angles, combing/sectioning methods, tool recommendations, and safety cautions (what not to trim). Use trade references (Milady, professional brows curricula) and corroborate with practicing clinicians for medical contraindications (active dermatitis, infections). Classify grooming guidance as practice‑based (moderate evidence) and explicitly label non‑medical tips as cosmetology practice rather than clinical evidence. Include photos/diagrams if available and a required tools list with sanitary guidelines.
What research is needed to support styling technique recommendations (brow gels, soap brows, heated brushes, adhesives)?
Ingredient and formulation references (cosmetic ingredient databases, SDS/MSDS) for polymer film‑formers and adhesives, manufacturer user manuals for heated tools (safe temperature ranges), and product safety data. Also consult cosmetology training materials and small controlled comparative product tests where available. Rate styling efficacy evidence as trade/practice level (low‑moderate); safety evidence can be higher if from manufacturer SDS and product testing. Emphasize temporary nature of mechanical styling and list contraindications (skin sensitivity, proximity to eyes).
What sources and inputs are needed to evaluate mechanical ‘training’ claims (brushing, adhesive training, heat‑setting) for permanent direction change?
Systematic literature searches for clinical trials or observational studies on permanent follicle re‑orientation; cosmetology and transplant surgery literature that clarifies follicle orientation determinants (eyebrow transplant studies showing implantation angle determines long‑term direction). Where clinical evidence is absent, rely on trade sources for temporary techniques and clearly state lack of RCTs proving permanent change. Interview hair transplant surgeons and senior cosmetology educators to explain biological plausibility and limits. Classify claims about permanent change from brushing/adhesives as low/unsupported evidence; transplantation as a high‑evidence surgical option for durable change (supported by transplant literature).
Does Vitamin E Oil Help Eyebrows Grow? Safe Routine & Timeline
Find out if vitamin E oil helps eyebrow growth, plus a safe routine, timelines, and what works better.